Oh, the crispy, gooey goodness of Rice Krispie Treats! But here’s a twist—what if you could make them healthy with just three ingredients? Imagine the nostalgia of childhood treats colliding with the satisfaction of a guilt-free snack.
Steps
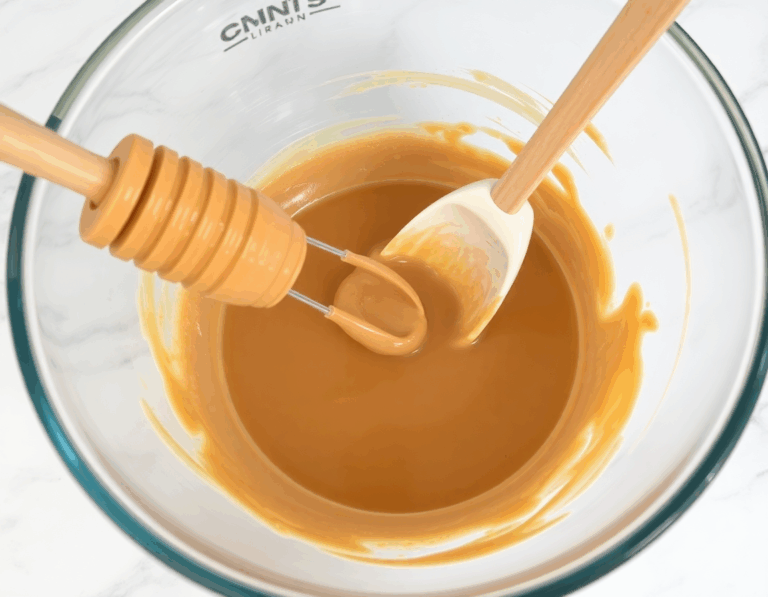
- Combine peanut butter and honey in a large mixing bowl, ensuring they are thoroughly mixed and smooth.
- Add the crispy rice cereal to the bowl and gently stir until the cereal is evenly coated with the peanut butter mixture.
- Firmly press the cereal mixture into a parchment-lined 8×8 inch pan, spreading it out evenly.
- Refrigerate the pan for a minimum of four hours, preferably overnight, or place it in the freezer for at least an hour.
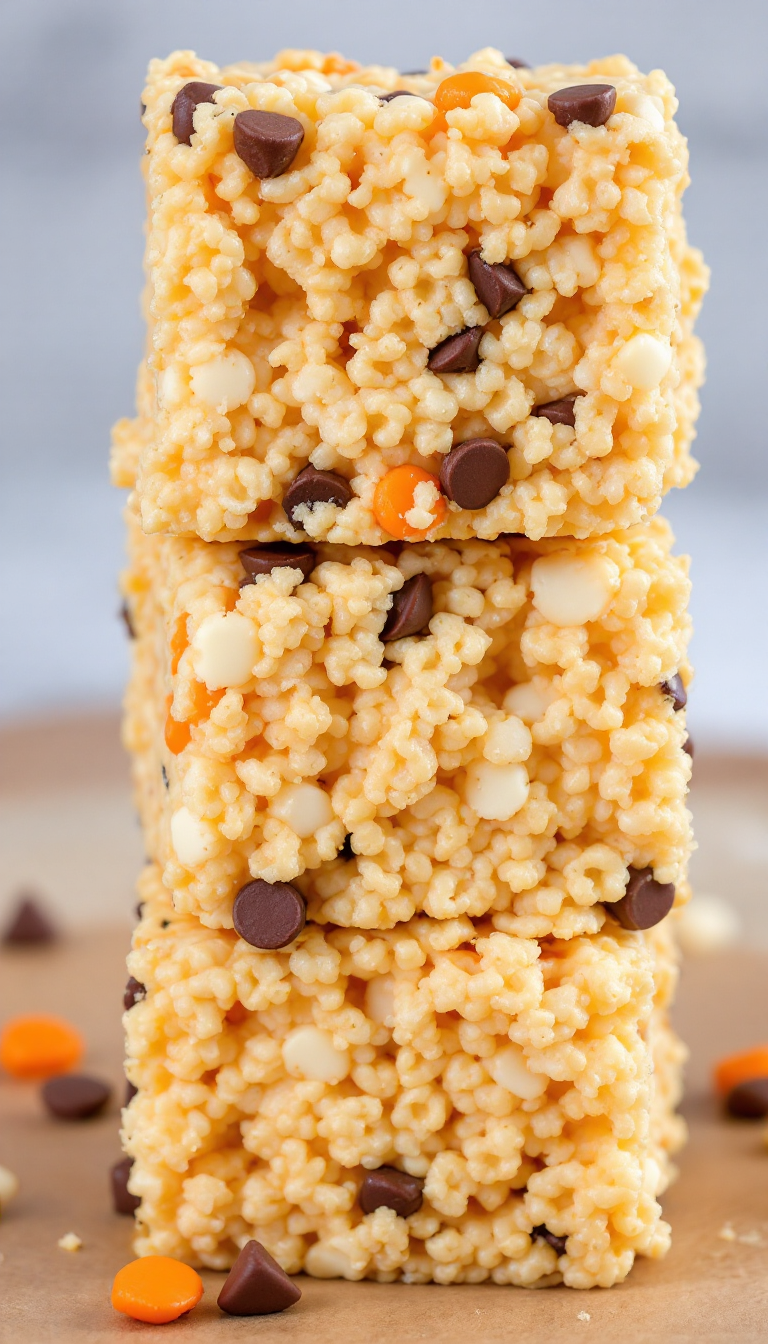
- Once set, use a sharp knife to slice the treats into 16 squares and enjoy.
Ingredients
- 4 cups crispy rice cereal
- 1/2 cup smooth peanut butter
- 1/2 cup honey
- 1 teaspoon vanilla extract (optional)
Nutritional Values
Calories: 1472kcal | Carbohydrates: 256g | Protein: 32g | Fat: 48g | Sodium: 704mg | Potassium: 1040mg | Fiber: 16g | Sugar: 144g | Calcium: 64mg
FAQ
- Which cereal is best for making these rice krispie treats?
- Any crispy rice cereal will work well for this recipe. You can choose the classic Rice Krispies cereal, which is budget-friendly, or try alternatives like sprouted brown rice crisps.
- How should I store the rice krispie treats?
- Store the treats in the refrigerator for up to one week. They maintain their shape and texture best when kept cold. Avoid storing them at room temperature as they will soften.
- Can these treats be frozen?
- Yes, you can freeze them. Wrap each piece in cling wrap and store in a freezer-safe bag or container. They can be kept in the freezer for up to three months. Thaw at room temperature before eating.
- Are there any alternative ingredients I can use?
- Yes, you can substitute peanut butter with other nut butters like almond, cashew, or sunflower seed butter to make it allergy-friendly. Ensure the nut butter is smooth for the best texture.
- What’s a tip for achieving perfect texture in these treats?
- Make sure the peanut butter and honey mixture is completely smooth and runny. This ensures the treats stick together properly and have the ideal chewiness and crispness.
Tips
- Use room temperature peanut butter to ensure it mixes smoothly with the honey, creating the perfect binding consistency for your treats.
- Line your 8×8 inch pan with parchment paper before pressing in the mixture; this helps in easily removing the bars and makes cleanup simpler.
- Press the mixture firmly into the pan using an additional piece of parchment paper to prevent it from sticking to your hands.
- To maintain the ideal texture, store the finished treats in the refrigerator and enjoy them chilled.
Equipment
- Microwave-safe bowl – For melting and combining ingredients if you’re opting for the microwave method.
- Small saucepan – If you prefer the stove method for melting and combining ingredients.
- 8×8 inch baking pan – To press the mixture into and form the treats.
- Parchment paper – For lining the pan to make it easier to remove the treats and for easy cleanup.
- Serrated knife – For cutting the treats into squares.
